


A Vintage Dinner Recipe with Common Food Bank Items
![]()
Dinner RecipesRecipesLess Than 10 IngredientsDessert Recipes
Visited a food bank lately and not sure what to make with food bank items? We’re here to help, armed with hearty recipes from hundreds of years ago that’ll make a complete dinner: main, side, and dessert.
We know that going to a food bank means you have limited options in terms of what you can make, but you still want an enjoyable meal. We also understand that you may not have a kitchen full of gadgets – or even appliances! – to make everything you want.
We’ve tried to keep it really simple with good, hearty food that requires nothing more than basic kitchen implements, a stove or hot plate, and some common food bank items.
Let’s made a robust, delicious dinner!
What do you get at a food bank?
If you’ve never been to a food bank, you might not be sure what you get at a food bank.
The vague answer is: it depends. Every food bank is different and even each food bank’s offerings vary each week, depending on what they’ve received.
In general, though, you can expect:
- Dried goods: beans, rice, pasta, cereal/oatmeal, and lentils.
- Canned goods: often basic vegetables, fruits, and sometimes meat.
- Bread and other baked goods.
- Frozen items. Pre-cooked meals, meat, etc.
- Fresh produce & meat (more rare).
- Milk & butter (more rare).
In general, you can expect more shelf-stable items to be the main part, with the addition of fresh produce, meat, and dairy less likely or abundant. Still, there’s plenty we can do with that!
That being said…
In these simple vintage recipes, you’ll notice quite a lot of dairy and eggs. That’s because in the past, those were the bulk of widely available ingredients; plus, many folks kept their own chickens and cows. Don’t worry – we’ll give you some substitution ideas in case you didn’t get any dairy in your food bank pickup.
And when you do have a little budget for groceries? Check out our cheap pantry essentials list for what we recommend keeping on hand.
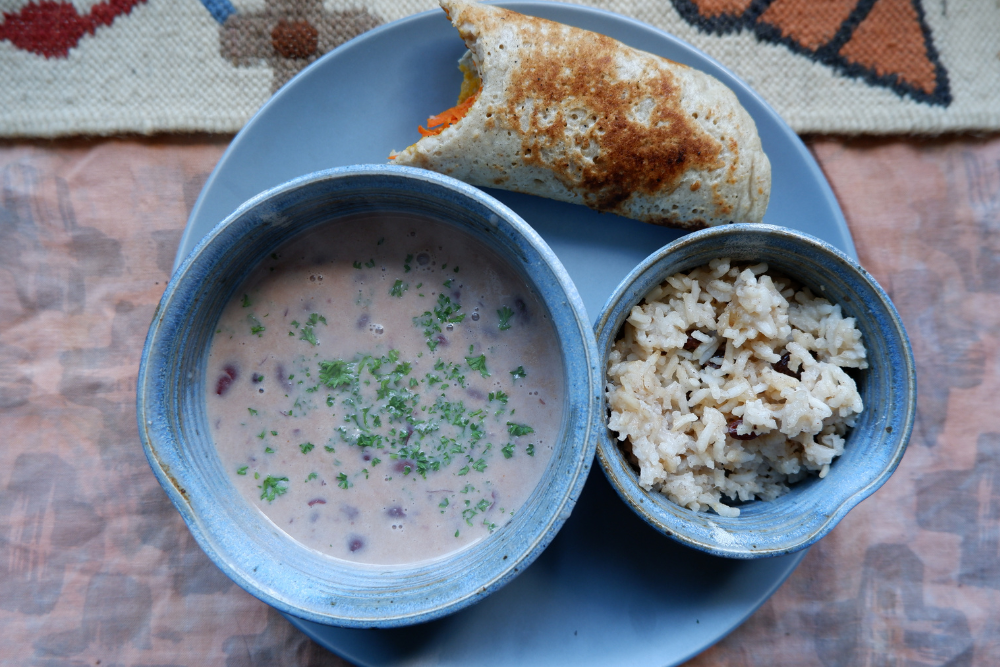
Main: Bean Soup Recipe
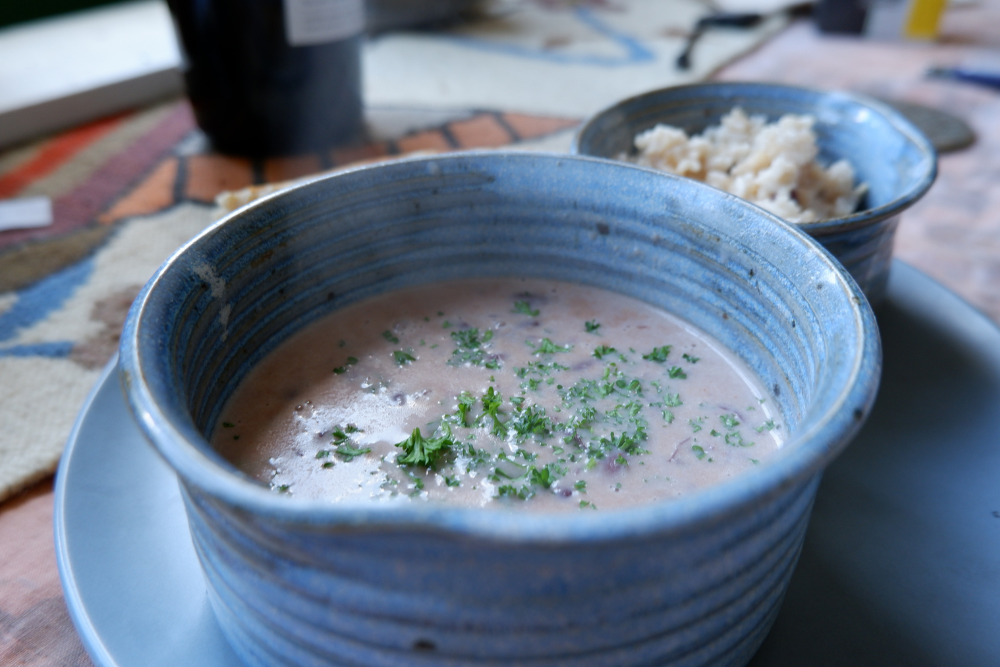
A classic with an ultra-cheap protein that’s almost always on offer at the food bank. So easy it’s barely a recipe, this cheap bean soup recipe is from 175 Choice Recipes Mainly Furnished by Members of the Chicago Women’s Club, published in 1887.
Ingredients: beans (any kind works!), crackers (like Ritz), butter, salt, red pepper. Optional: milk or stock
- Take 2 cups of cooked beans* and mash through a sieve for best results. Just mashing is fine too, but not as smooth.
- Add 4 crushed crackers (this will act as a cheap thickener!),
- Add 8 cups of liquid. The original recipe calls for milk – you could use all milk (but $$$!) or some combination of milk, water, and/or stock will be just fine. Add a little milk if possible for creaminess.
- Add 4 tablespoons of butter, salt, and a dash of red pepper to taste.
- Boil together for 5 minutes and serve hot. Top with some fresh herbs if you’ve got them.
* We recommend using dried beans because they’re so much cheaper. If you get then from the food bank, simply cover them with water, add a little salt, and let them sit overnight. The next day, drain, add more water, and boil them for 15-20 minutes on a stove or hot plate. They’ll get done much faster that way.
Side: Staffordshire Oatcakes

Simple to make, the Staffordshire oatcakes are a hearty, solid mix between a crepe and a pancake. They’re usually filled with cheese and bacon but are versatile to work both savory and sweet. In this dinner, we recommend some roasted vegetables or a veggie-based spread. We did a simple variation on this carrot salad. Adapted from a traditional British recipe.
Ingredients: oat flour*, flour, salt, yeast, water, sugar. Optional: milk.
- Mix 1 cup of oat flour, 1 cup of regular flour, and 1/2 tsp of salt.
- In another bowl, mix 1 cup of warm water and 1 cup of warm milk. Two cups of water also works just fine! The batter will look extremely loose – don’t worry, it will thicken up.
- Dissolve 1/4 tsp yeast in the warm liquid and then mix the wet and dry ingredients.
- Cover the batter with a cloth and let it sit for about an hour in a warm spot.
- Heat a pan on medium-high and grease with butter or oil. Pour some batter in to the size you like.
- Flip the oatcake after 2-3 minutes and cook for another few minutes until the sides are golden brown and lovely!
* If you have a blender, you can blitz your oats for a few seconds to get flour. Otherwise, just sift out your oatmeal to get the powder and smaller bits that go to the bottom of the container!
Dessert: Rice Pudding
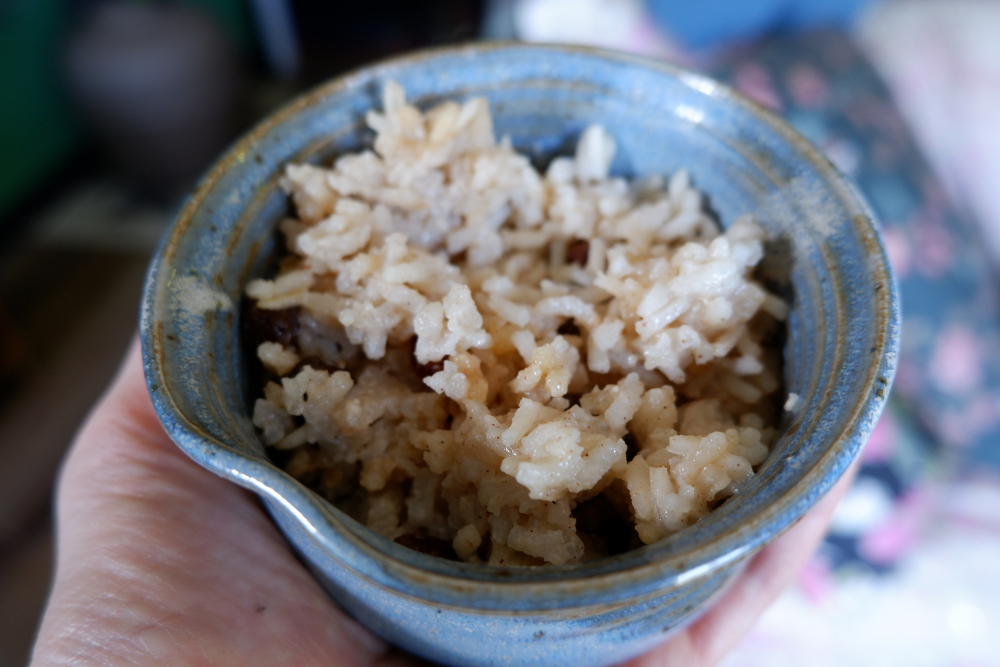
We feel like rice pudding has fallen out of favor, but why? It’s cheap, filling, and endlessly customizable based on what additions you’ve got. The basis of this recipe is from “A Cheap Rice Pudding Baked” in The Art of Cookery, Made Plain and Easy, written in 1747.
Ingredients: rice, milk (or water)*, butter, sugar, nutmeg/cinnamon. Optional: fruit.
- Add 1/2 cup of rice and 2 1/2 cups of milk to a pot. Heat to a boil and immediately reduce to a simmer and stir often so it doesn’t burn.
- When it begins to thicken after around 15 minutes, remove from heat and let cool slightly. Add 3-4 tablespoons of butter/margarine and sugar to taste. We added about 2 heaping spoonfuls. Also add in a dash of cinnamon or nutmeg if you have it.
- If you want to add fruit – we recommend raisins of finely chopped apple – stir it in now. We added around 1/3 cup of raisins.e
- The original dish called for the rice pudding to be baked. If you have an oven, bake the pudding at 325 for about an hour. If you don’t have an oven, simply heat the pudding on a very low heat and cook for another 15-20 minutes, stirring frequently!
* You could use a lot of different things here! Just water, a mixture of milk and water, soy milk… You could also sub evaporated milk or even water and sweetened condensed milk, depending on what you’ve been given at the food bank. Stay flexible!
A Vintage Dinner Recipe with Common Food Bank Items
Dinner RecipesRecipesLess Than 10 IngredientsDessert Recipes
Visited a food bank lately and not sure what to make with food bank items? We’re here to help, armed with hearty recipes from hundreds of years ago that’ll make a complete dinner: main, side, and dessert.
We know that going to a food bank means you have limited options in terms of what you can make, but you still want an enjoyable meal. We also understand that you may not have a kitchen full of gadgets – or even appliances! – to make everything you want.
We’ve tried to keep it really simple with good, hearty food that requires nothing more than basic kitchen implements, a stove or hot plate, and some common food bank items.
Let’s made a robust, delicious dinner!
What do you get at a food bank?
If you’ve never been to a food bank, you might not be sure what you get at a food bank.
The vague answer is: it depends. Every food bank is different and even each food bank’s offerings vary each week, depending on what they’ve received.
In general, though, you can expect:
- Dried goods: beans, rice, pasta, cereal/oatmeal, and lentils.
- Canned goods: often basic vegetables, fruits, and sometimes meat.
- Bread and other baked goods.
- Frozen items. Pre-cooked meals, meat, etc.
- Fresh produce & meat (more rare).
- Milk & butter (more rare).
In general, you can expect more shelf-stable items to be the main part, with the addition of fresh produce, meat, and dairy less likely or abundant. Still, there’s plenty we can do with that!
That being said…
In these simple vintage recipes, you’ll notice quite a lot of dairy and eggs. That’s because in the past, those were the bulk of widely available ingredients; plus, many folks kept their own chickens and cows. Don’t worry – we’ll give you some substitution ideas in case you didn’t get any dairy in your food bank pickup.
And when you do have a little budget for groceries? Check out our cheap pantry essentials list for what we recommend keeping on hand.
Main: Bean Soup Recipe
A classic with an ultra-cheap protein that’s almost always on offer at the food bank. So easy it’s barely a recipe, this cheap bean soup recipe is from 175 Choice Recipes Mainly Furnished by Members of the Chicago Women’s Club, published in 1887.
Ingredients: beans (any kind works!), crackers (like Ritz), butter, salt, red pepper. Optional: milk or stock
- Take 2 cups of cooked beans* and mash through a sieve for best results. Just mashing is fine too, but not as smooth.
- Add 4 crushed crackers (this will act as a cheap thickener!),
- Add 8 cups of liquid. The original recipe calls for milk – you could use all milk (but $$$!) or some combination of milk, water, and/or stock will be just fine. Add a little milk if possible for creaminess.
- Add 4 tablespoons of butter, salt, and a dash of red pepper to taste.
- Boil together for 5 minutes and serve hot. Top with some fresh herbs if you’ve got them.
* We recommend using dried beans because they’re so much cheaper. If you get then from the food bank, simply cover them with water, add a little salt, and let them sit overnight. The next day, drain, add more water, and boil them for 15-20 minutes on a stove or hot plate. They’ll get done much faster that way.
Side: Staffordshire Oatcakes
Simple to make, the Staffordshire oatcakes are a hearty, solid mix between a crepe and a pancake. They’re usually filled with cheese and bacon but are versatile to work both savory and sweet. In this dinner, we recommend some roasted vegetables or a veggie-based spread. We did a simple variation on this carrot salad. Adapted from a traditional British recipe.
Ingredients: oat flour*, flour, salt, yeast, water, sugar. Optional: milk.
- Mix 1 cup of oat flour, 1 cup of regular flour, and 1/2 tsp of salt.
- In another bowl, mix 1 cup of warm water and 1 cup of warm milk. Two cups of water also works just fine! The batter will look extremely loose – don’t worry, it will thicken up.
- Dissolve 1/4 tsp yeast in the warm liquid and then mix the wet and dry ingredients.
- Cover the batter with a cloth and let it sit for about an hour in a warm spot.
- Heat a pan on medium-high and grease with butter or oil. Pour some batter in to the size you like.
- Flip the oatcake after 2-3 minutes and cook for another few minutes until the sides are golden brown and lovely!
* If you have a blender, you can blitz your oats for a few seconds to get flour. Otherwise, just sift out your oatmeal to get the powder and smaller bits that go to the bottom of the container!
Dessert: Rice Pudding
We feel like rice pudding has fallen out of favor, but why? It’s cheap, filling, and endlessly customizable based on what additions you’ve got. The basis of this recipe is from “A Cheap Rice Pudding Baked” in The Art of Cookery, Made Plain and Easy, written in 1747.
Ingredients: rice, milk (or water)*, butter, sugar, nutmeg/cinnamon. Optional: fruit.
- Add 1/2 cup of rice and 2 1/2 cups of milk to a pot. Heat to a boil and immediately reduce to a simmer and stir often so it doesn’t burn.
- When it begins to thicken after around 15 minutes, remove from heat and let cool slightly. Add 3-4 tablespoons of butter/margarine and sugar to taste. We added about 2 heaping spoonfuls. Also add in a dash of cinnamon or nutmeg if you have it.
- If you want to add fruit – we recommend raisins of finely chopped apple – stir it in now. We added around 1/3 cup of raisins.e
- The original dish called for the rice pudding to be baked. If you have an oven, bake the pudding at 325 for about an hour. If you don’t have an oven, simply heat the pudding on a very low heat and cook for another 15-20 minutes, stirring frequently!
* You could use a lot of different things here! Just water, a mixture of milk and water, soy milk… You could also sub evaporated milk or even water and sweetened condensed milk, depending on what you’ve been given at the food bank. Stay flexible!